
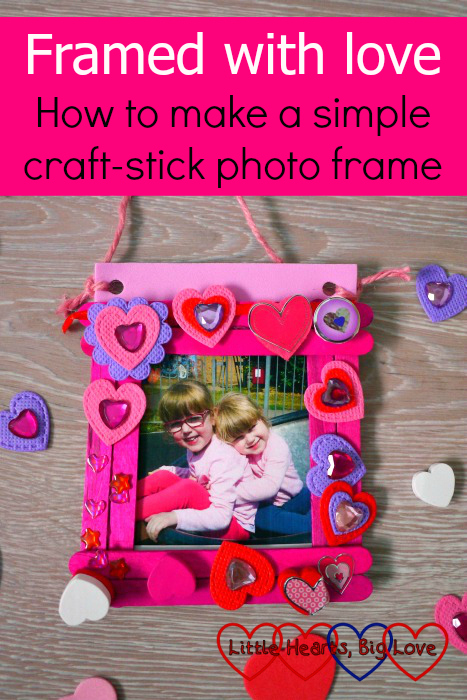
I enjoyed being one of the Tots100 #BostikBloggers last year and am so happy to be able to continue doing it this year. Each month, I will be sent a craft box from Craft Merrily to create something in line with that month’s theme. I’m looking forward to sharing each month’s crafts along with instructions on how you can make them yourself. This month’s theme is Valentine’s Day. The girls and I have had fun making a pretty craft-stick photo frame decorated with heart shapes. It’s a lovely simple craft which is perfect for Valentine’s Day. It could also be used to make a simple Mother’s Day gift.
You will need:
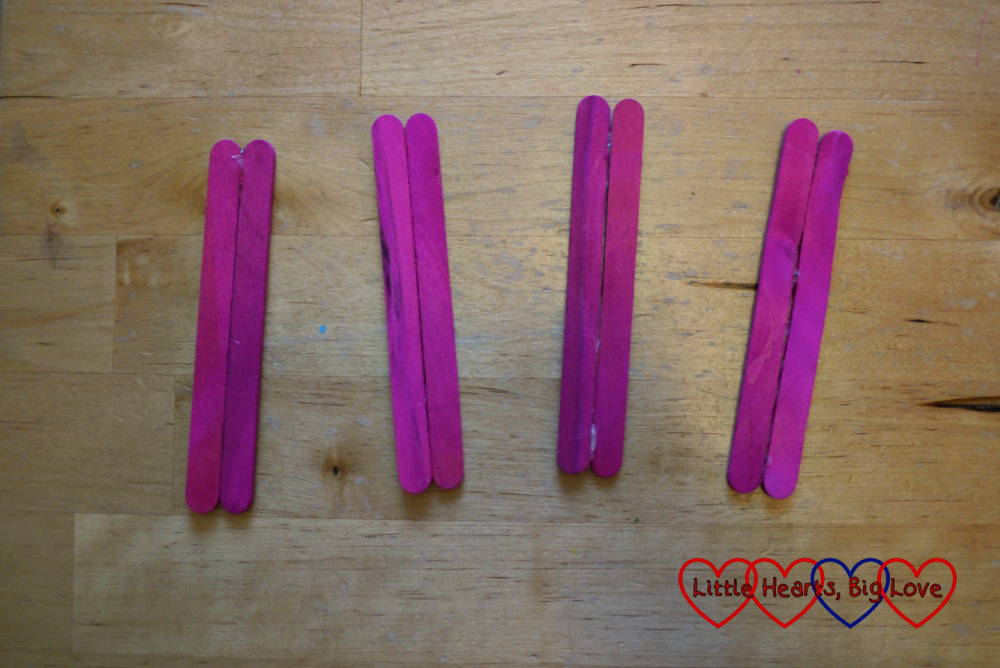
- 8 craft sticks
- A hot glue gun
- Glue dots (we used Bostik Glu dots)
- Heart foam shapes, heart shaped buttons and/or heart stickers
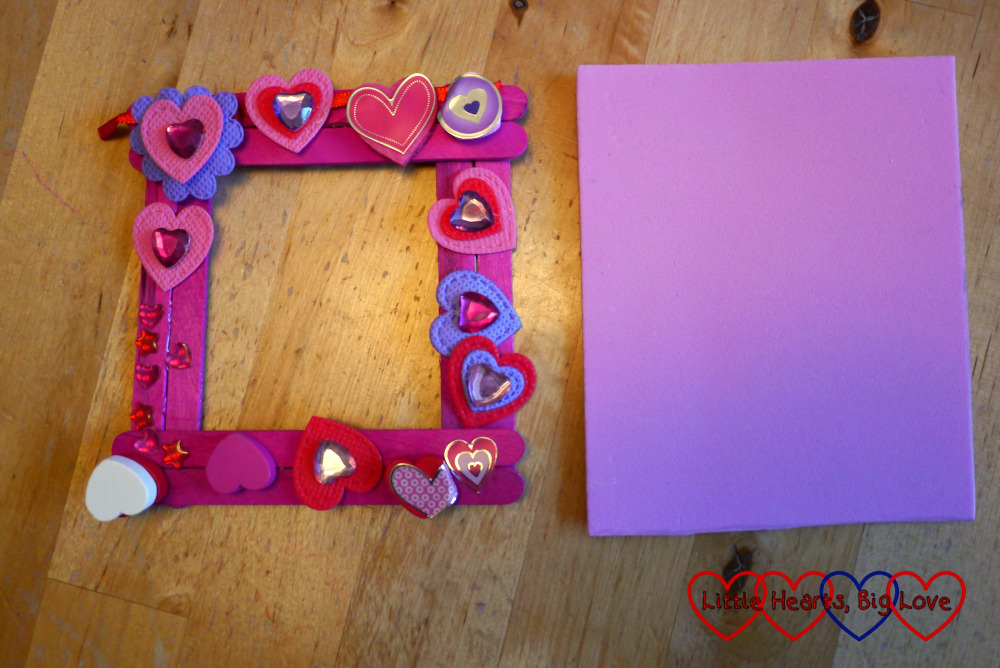
- A sheet of craft foam
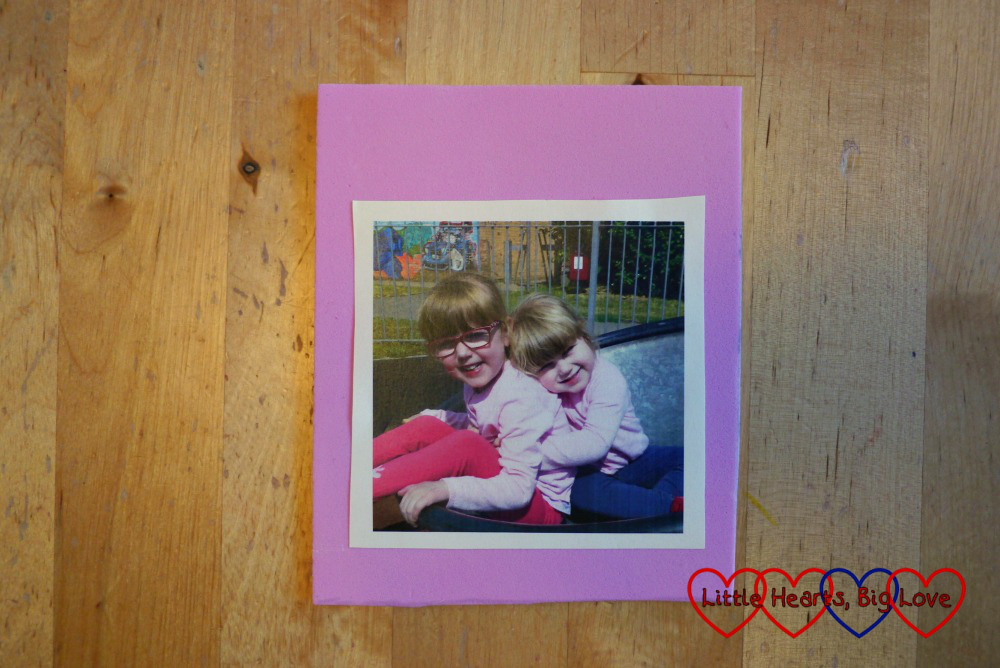
- A photo (approx 7.5cm square)
- Pencil
- Scissors
- String
- Hole punch
1) Glue two craft sticks together along the longest edge using hot glue. Repeat with the other craft sticks until you have four sets of pairs.
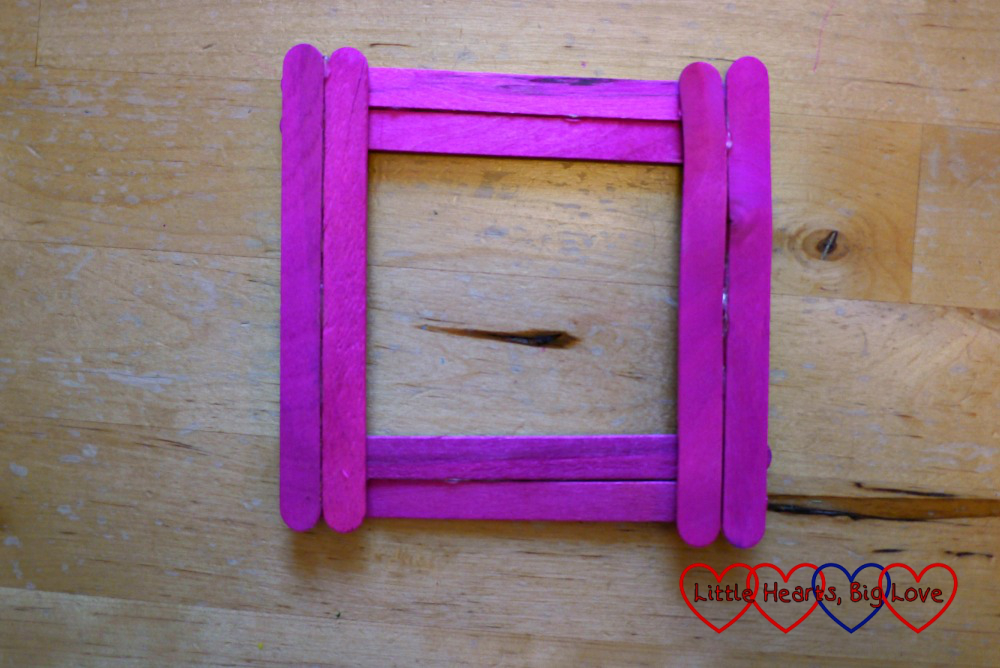
2) Glue the four sets of craft sticks together to form a square shape.
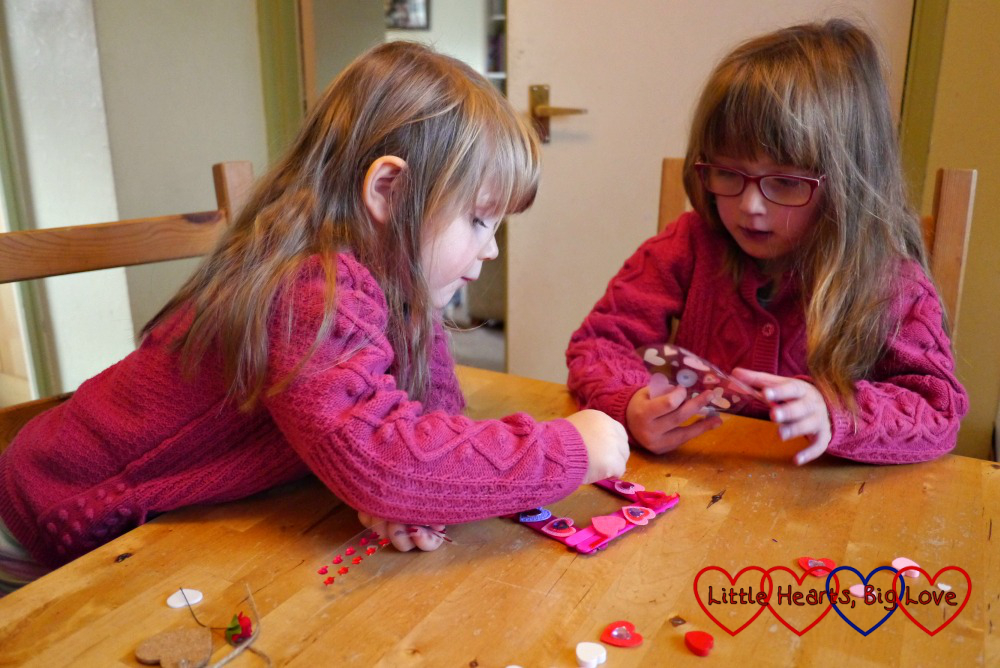
3) Decorate with fabric heart shapes, heart-shaped buttons and stickers, using glue dots to fix the heart shapes to the craft stick frame.
4) Cut a piece of craft foam slightly narrower than the width of the frame and about 3cm longer.
5) Place photo on the craft foam. Make sure it is line with the craft-stick frame when the frame is placed on top with the bottom edge of the frame against the bottom edge of the craft foam. Remove the frame and use glue dots to fix photo in place.
6) Place glue dots in each corner on the back of the craft frame. Place over the photo and press down to stick to the craft foam backing.
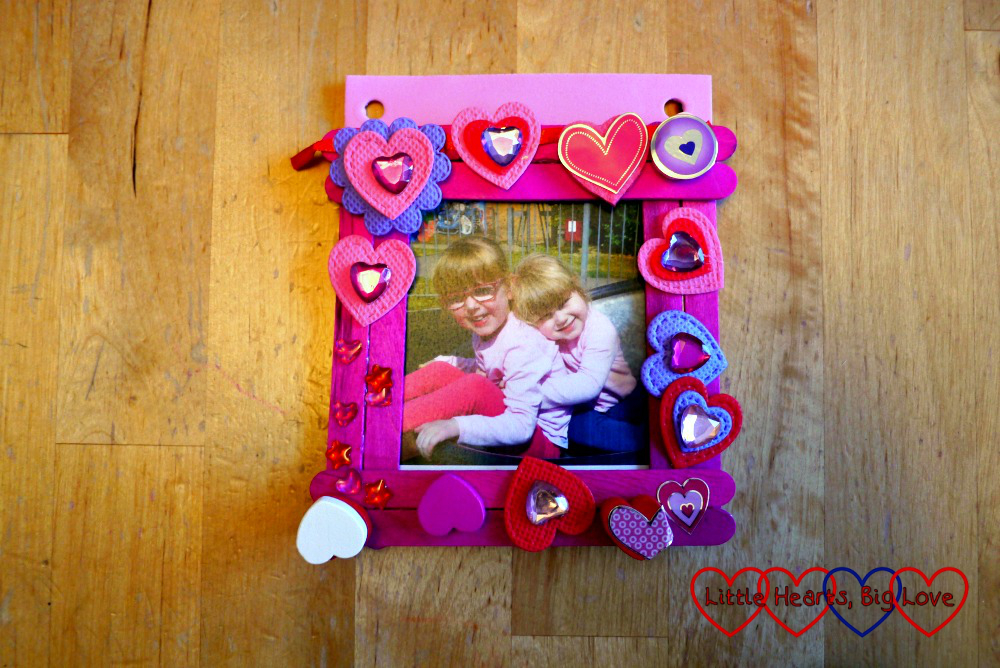
7) Punch holes in the top corners of the craft foam above the photo frame. Thread through some string and tie at the corners. Your craft stick frame is now ready to hang up.
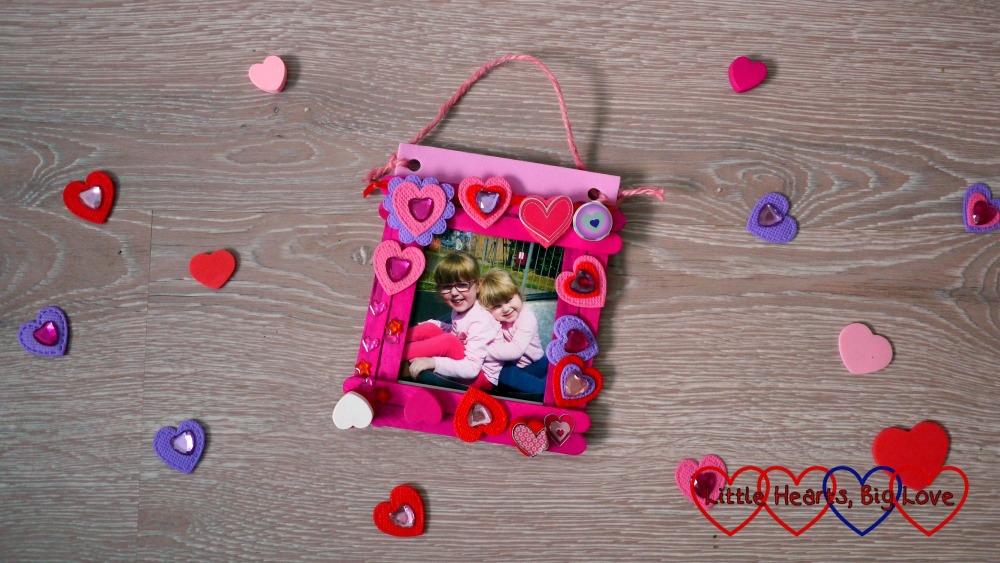
The girls loved their finished photo frame. They were able to do the sticking with glue dots by themselves with a little help from me to line up the photo frame. It took us about half an hour to make. You could use PVA glue instead to stick the craft sticks together for the frame if you wanted to make the first steps more child-friendly. You could also change the decorations to create a photo frame for any occasion.
We were sent a box of craft materials from Craft Merrily as part of being a Tots100 #BostikBlogger

Awww what a lovely idea. I will make one of these with my little girl to give to her daddy for Valentine’s day, I think. He’ll love it. #FamilyFunLinky
Thank you Sam, hope you have fun making it 🙂
Louise, this is so cute!
My Daughter and Son would love this, I will have to try it with them! 🙂
Thanks Marty. Hope they enjoy making it 🙂
Love this Louise, so simple! I’m a prolific crafter and try things out with Robert all the time. At 2 he’s just starting gain an interest in playing with things, he loves sticking, so do I over paint, glue although sticky is easier to clean over paint!! Foam shapes are a firm favourite! Maybe I’m destined to be a Bostik blogger one day, not that I’d know how! One step at a time. Sending all the love, Thank you for linking up to the #familyfunlinky
Thanks Karen. It is a lovely simple craft. I love foam shapes – so many things you can do with them 🙂
My oldest would love this! Your girls have grown so much – I bet they’ll make great big sisters! #familyfunlinky
Thank you – I think they’ll be great big sisters too 🙂