
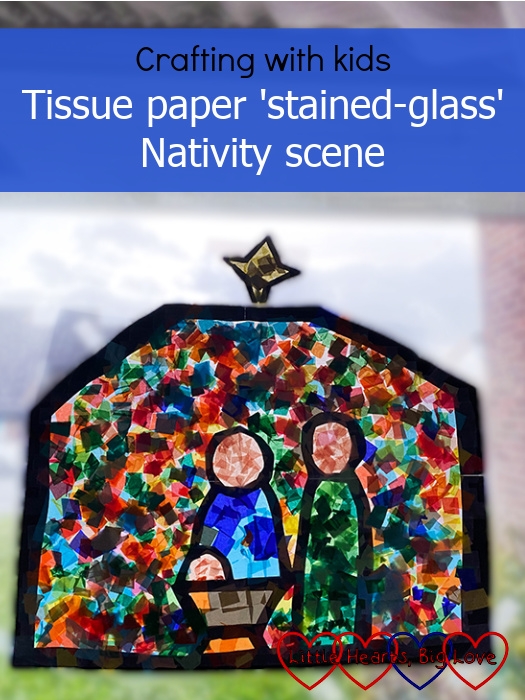
Small squares of tissue paper stuck on to sticky-back plastic is a great way of creating ‘stained-glass’ decorations to go on windows. We still have the Christmas tree and star that the girls made a few years ago which come out each year to decorate our living room windows. Now that Sophie’s older, I thought she might enjoy a more complicated version – making a tissue paper ‘stained-glass’ Nativity scene.
You will need:
- Tissue paper in assorted colours, cut into small squares.
- Containers to keep the tissue paper colours separated
- A large sheet of black paper or card (or a few smaller sheets stuck together with sticky tape)
- Clear sticky-back plastic
- Scissors
- A pencil
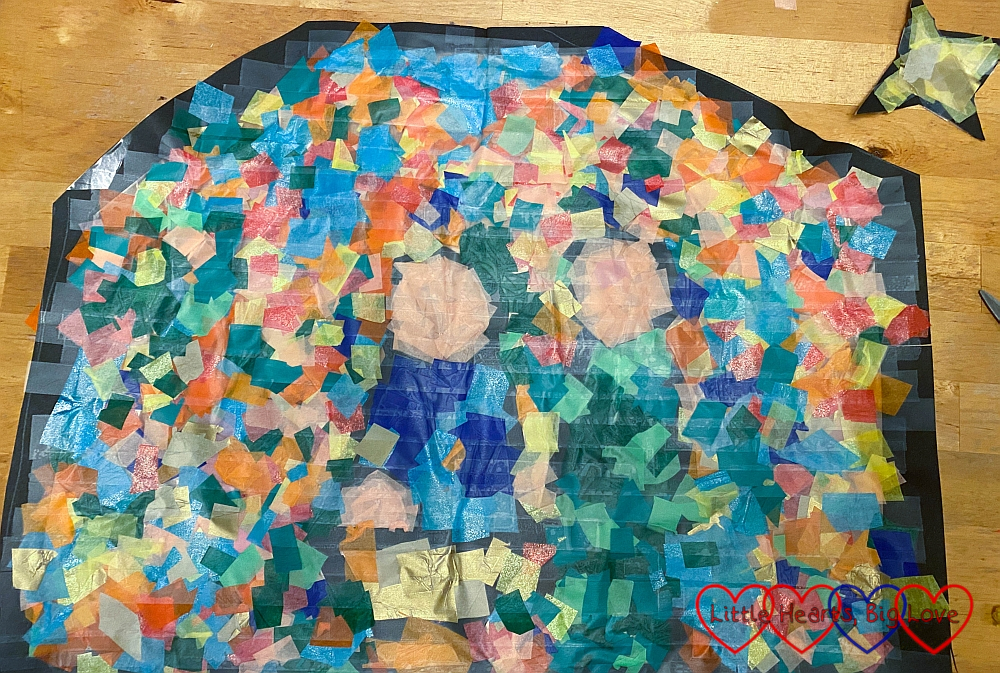
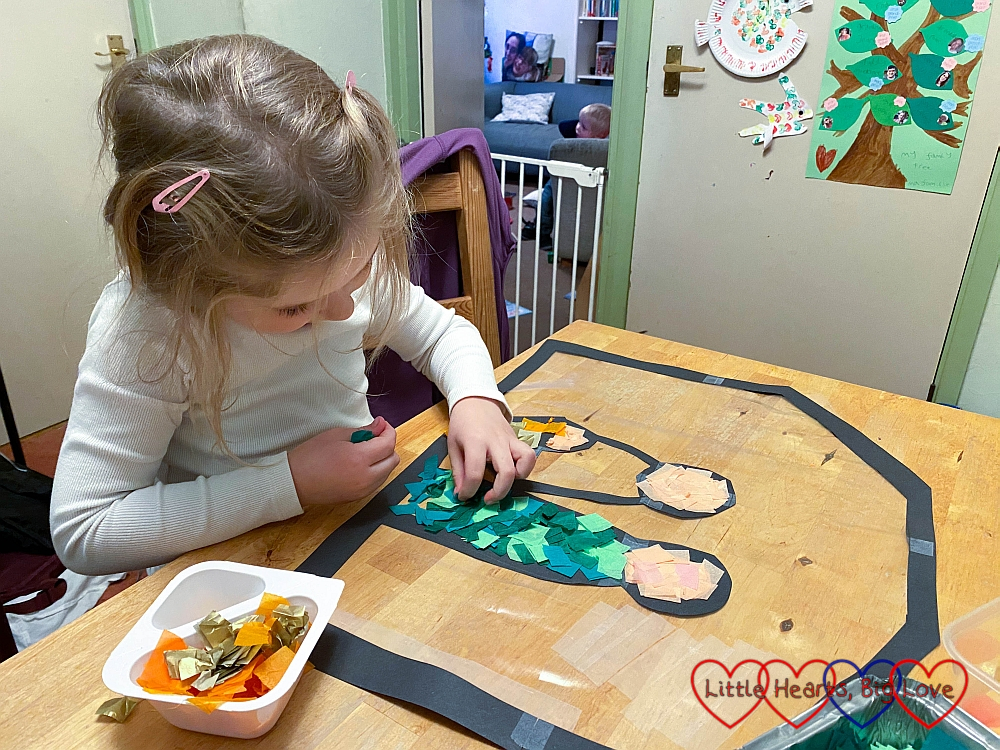
1) Draw the outlines for the Nativity scene (a stable outline with Mary and Joseph figures and baby Jesus in the manger) on black card and carefully cut out.
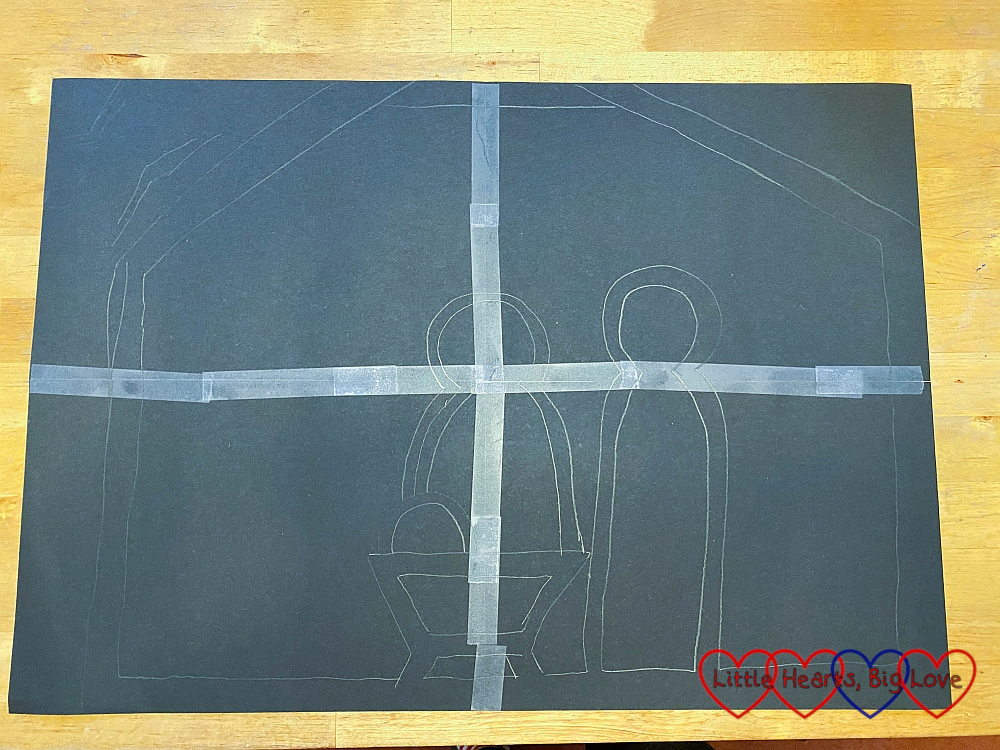
2) Cover the cut-out outline with clear sticky-back plastic and turn over so that the sticky side is uppermost.
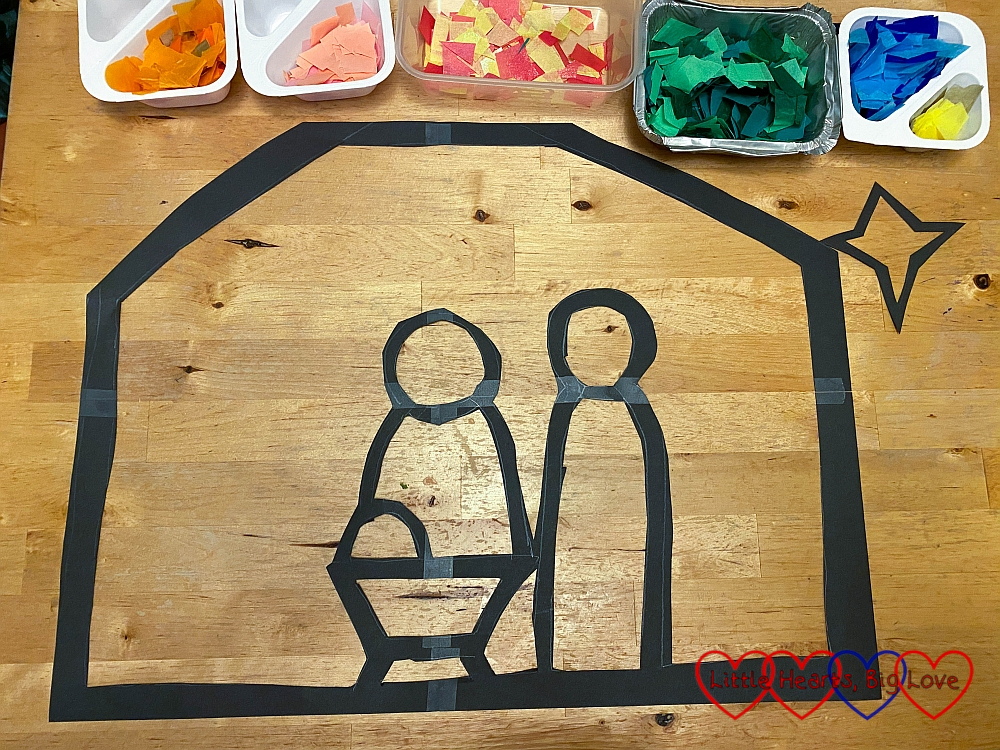
3) Fill in the each of the parts of the scene in coloured tissue paper – blues for Mary; greens or browns for Joseph; orange/gold/brown for the manger; yellow for the star; pink/peach for faces.
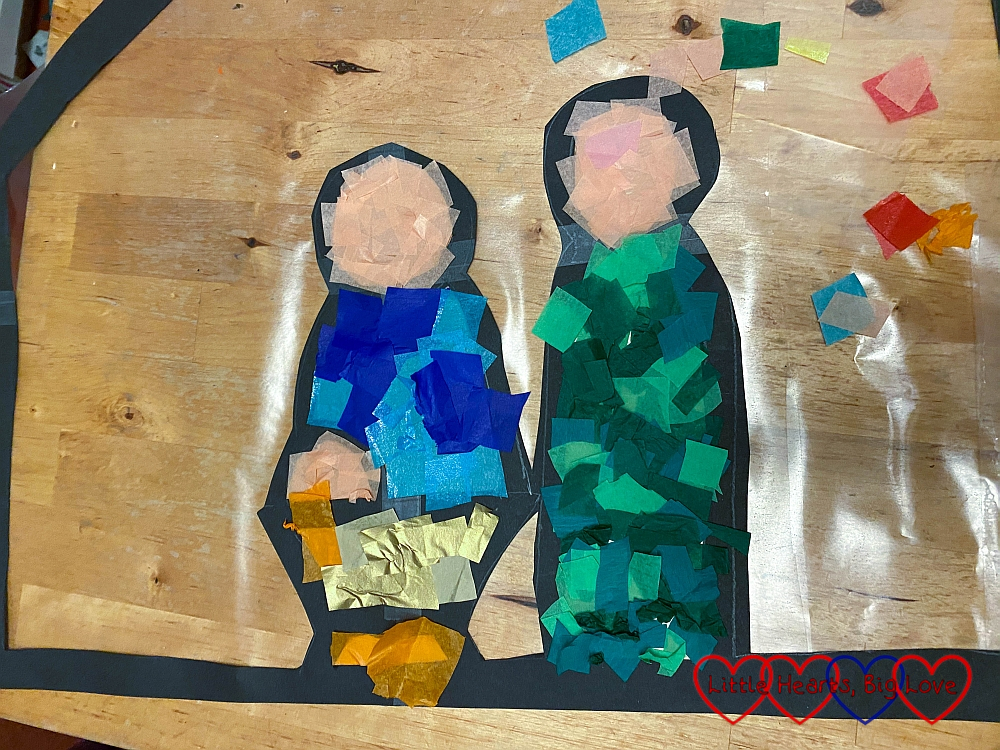
4) Use different coloured pieces of tissue paper to fill in the space around the figures in the stable until all the sticky back plastic is covered over with squares of tissue paper.

5) Cover with a layer of sticky-back plastic to seal. (We unfortunately ran out of sticky-back plastic during step 2 and had to resort to using strips of sticky tape instead which worked but took a bit more effort!)
6) Tape the finished Nativity scene to your window.
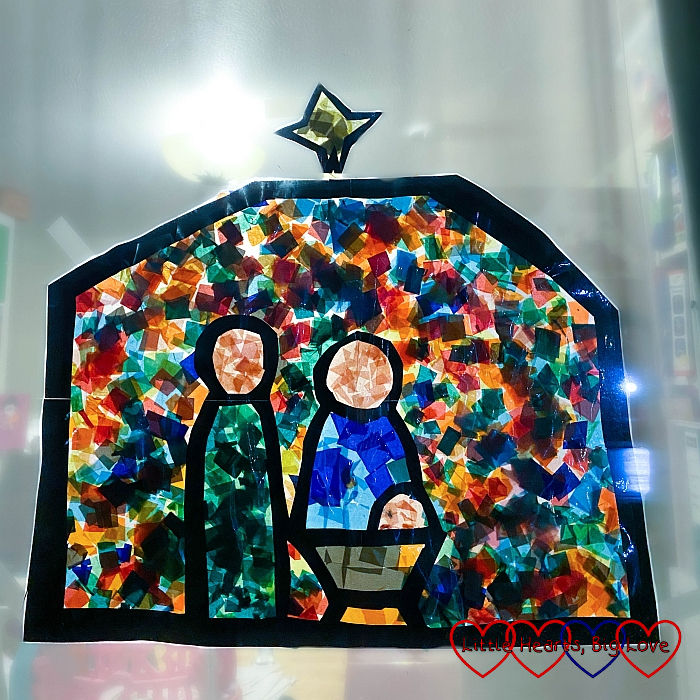
Sophie loved making her Nativity scene. Cutting out the outline and sticking it to the sticky-back plastic was quite fiddly so I did that part of it for her, but she managed to do the rest by herself. I love how effective the finished scene looks, especially at night with a light shining behind it.
This is such a good idea, why didn’t I think of it when I was working as a registered child minder? #kidsandkreativity@_karendennis
It was fun to make 🙂
This is lovely, and really effective too! I love making suncatchers with the kids with tissue paper and sticky back plastic. Thanks for linking up to #KidsandKreativity, hope to see you back next time.
Thank you, we enjoyed making it. It made such a lovely window decoration 🙂
This is a lovely idea 🙂 we usually have a few Christmas craft days during advent and our girls love it! #WedsBlogShare
We try and do some crafts together too 🙂