
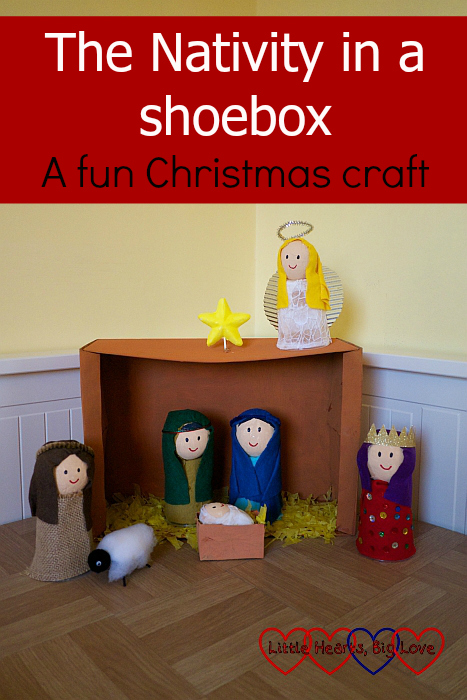
One of my favourite Christmas decorations is our Nativity scene. My girls love playing with the figures although I have to make sure they are careful not to break them. The contents of our latest #BostikBlogger craft box gave me an idea for the perfect Christmas craft project: a Nativity scene in a shoebox. The girls could have the fun of helping make their own Nativity figures and be able to play with them afterwards.
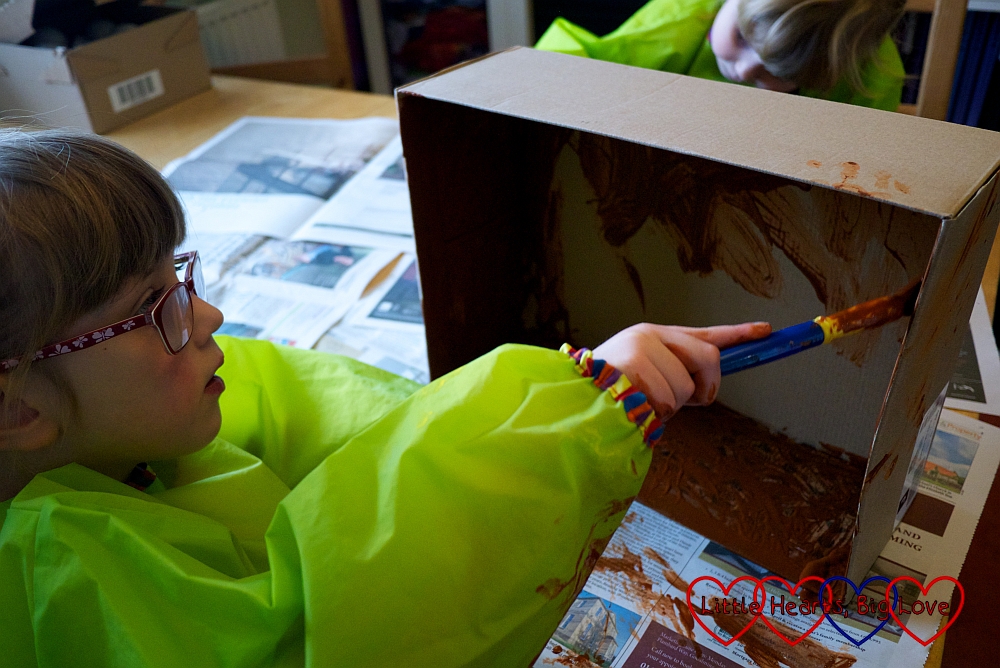
This is an ideal craft to do together as a family. My girls loved painting the shoebox and spreading glue on the cups and fabric while I did the trickier bits like painting the polystyrene balls and putting the figures together. We mostly used Bostik White Glu which meant the children were able to do a lot of the gluing and sticking. I did find a hot glue gun useful for some parts of the craft though. It took us about three days to make our Nativity. This is mostly due to having to wait for paint and glue to dry.
You will need:
- A large shoebox
- Paint (brown, yellow, skin colour) and paintbrushes
- A polystyrene or cardboard star
- Polystyrene balls
- Two polystyrene eggs
- Disposable cups
- A small plastic pot (dip pot size)
- A small cardboard box
- Matchsticks
- Felt, fabric and/or tissue paper
- Shredded yellow tissue paper
- Pipe cleaners and/or lengths of cord
- Silver cardboard
- Gold cardboard
- Sequins, beads or jewels
- Wadding or cotton wool
- A black pompom
- Two small googly eyes
- White tissue paper
- Blu tack
- Glue (we used Bostik White Glu)
- Glue gun and hot glue (optional)
- Black and red marker pens
- Scissors
- Craft knife and/or a sharp pencil
Making the stable
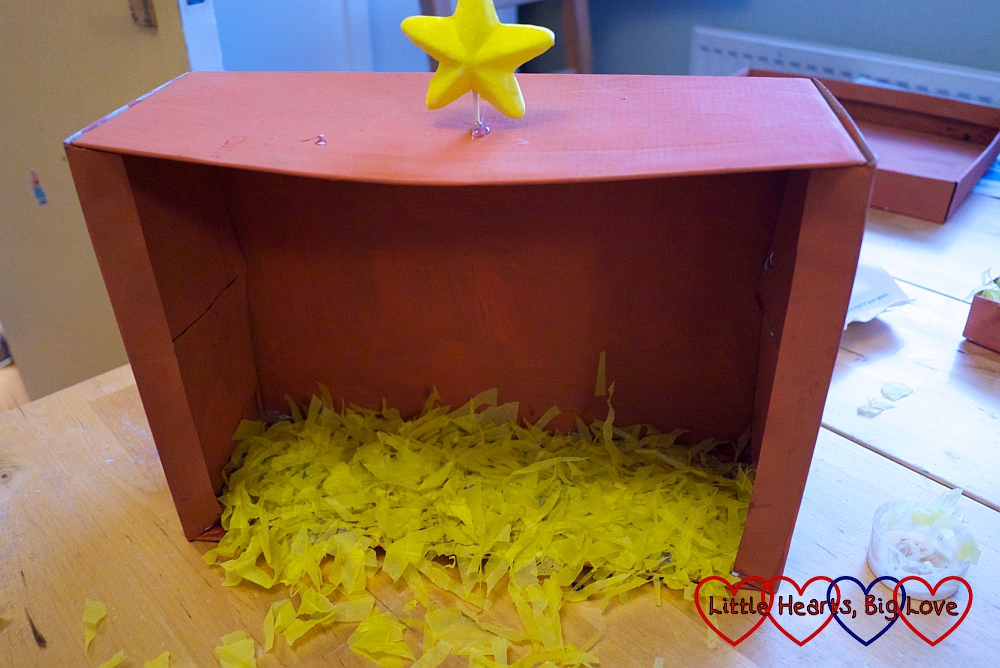
1) Paint the shoebox brown and leave to dry. Apply a second coat if needed.
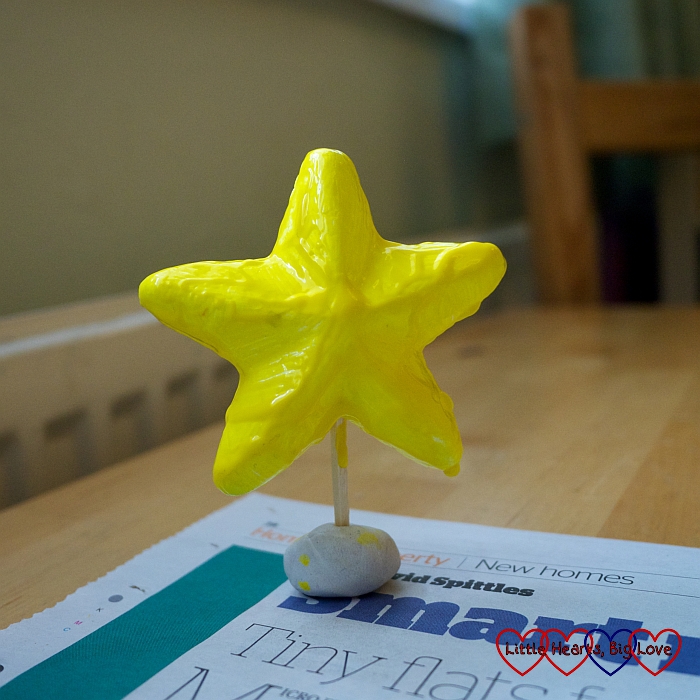
2) Dip the end of a matchstick in glue and push into the bottom of the star. Paint the star yellow. This is easier to do if you stick the other end of the matchstick into some blu tack to hold it on to the table. Leave to dry and apply a second coat of paint if needed.
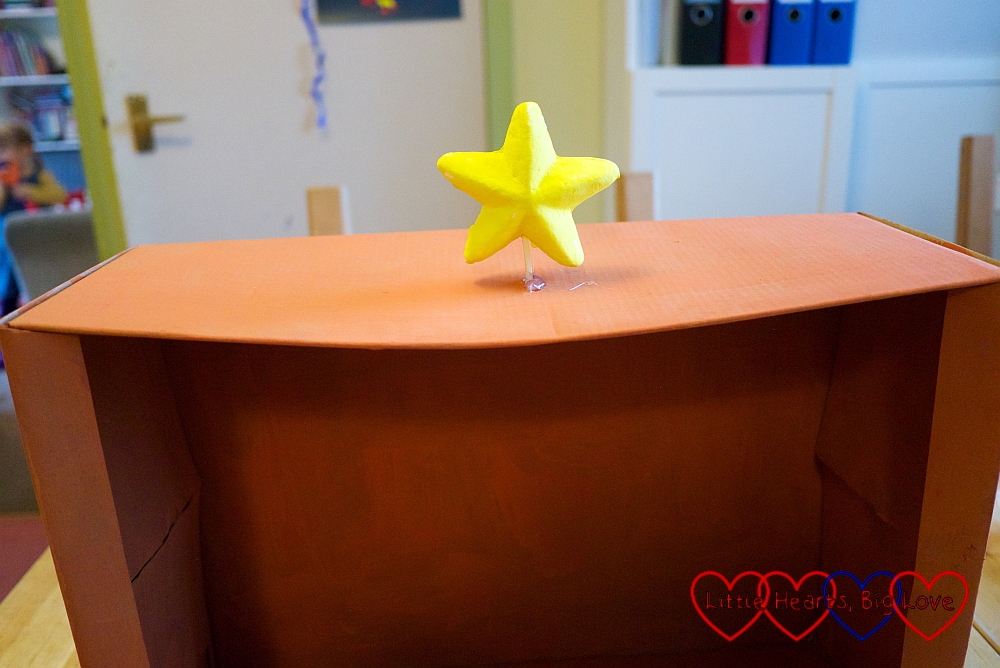
3) Make a hole in the centre of one of the long edges of the box by putting a piece of blu tack on one side and pushing a sharp pencil through the other into the blu tack. This will be the hole for the star at the top of the stable.
4) Push the matchstick at the bottom of the star into the hole and secure inside the box with blu tack. I also used a little hot glue around the matchstick at the top of the box to help stick the star in place.
5) Spread a layer of glue on the inside bottom edge of the shoebox. Cover with shredded yellow tissue paper. You can use pre-shredded tissue paper or cut sheets of tissue paper into small pieces which is good for practising scissor skills.
Making the figures
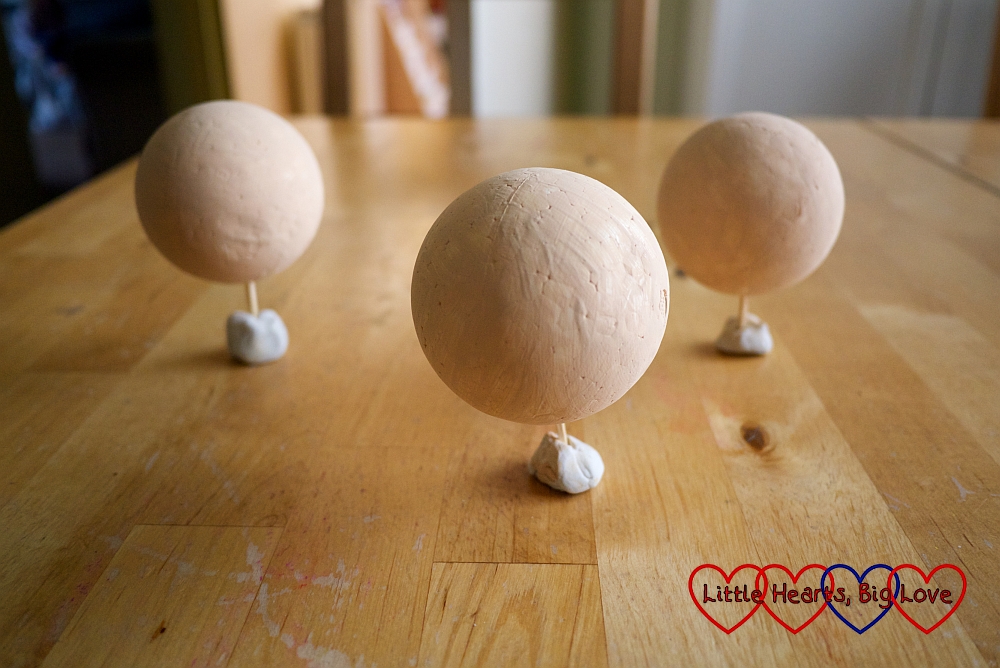
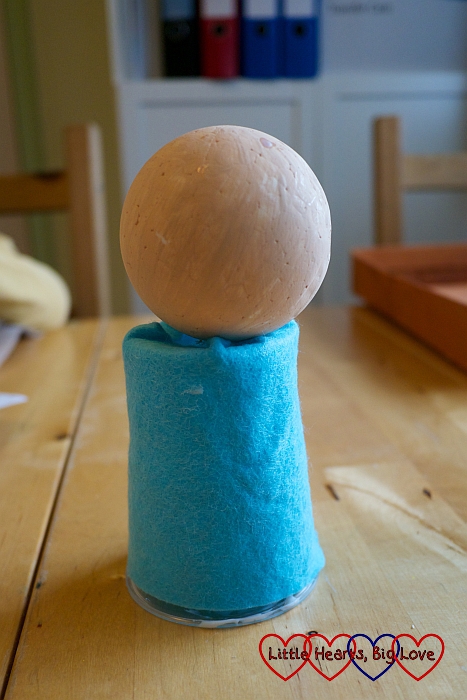
1) Dip the end of a matchstick in glue and stick into a polystyrene ball.
2) Paint the polystyrene ball using a skin-coloured tone of paint. This is easier if you stick the other end of the matchstick into some blu tack to hold it on the table. Leave to dry and apply a second coat of paint if needed.
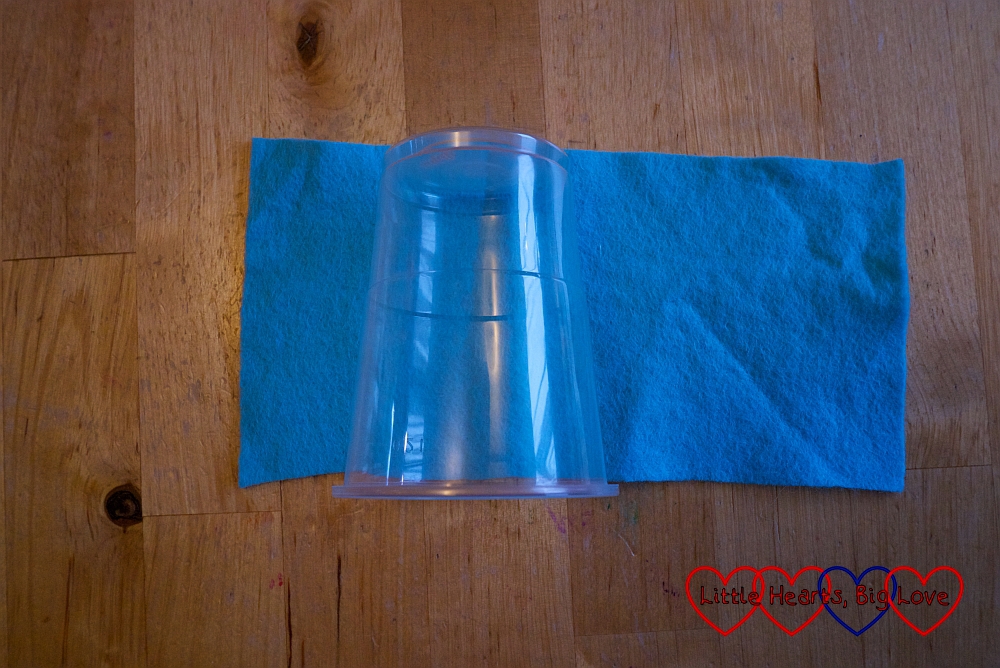
3) Place the cup on a piece of blu tack and make a small hole in the bottom by pushing a craft knife or a sharp pencil through the bottom of the cup and into the blu tack.
4) Cut a piece of felt that’s slightly longer than the cup and wide enough to wrap completely around it. You can use fabric or tissue paper instead of felt if you prefer.
5) Cover the outside of the cup with glue. My girls loved this part – it was messy, sticky fun!
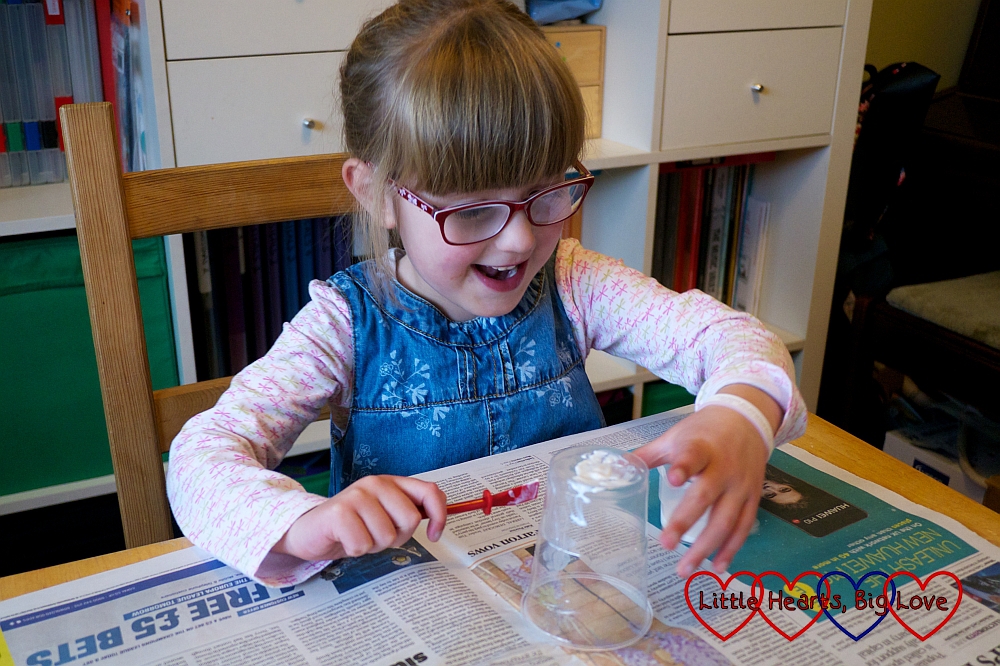
6) Wrap the piece of felt around the cup to make the body.
7) Take one of the polystyrene balls and push the matchstick through the hole in the cup until the polystyrene ball is resting on the cup to form the head.
8) Cut a slightly smaller second piece of felt, fabric or tissue paper. Cover with glue. Wrap around the polystyrene ball to make a head covering.
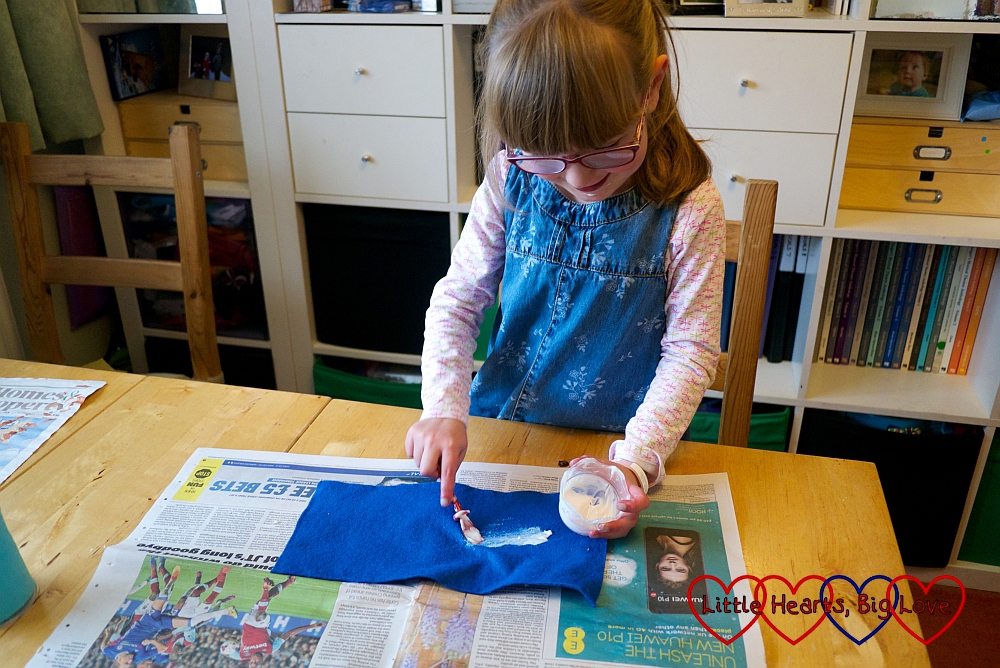
9) Wrap a piece of pipe cleaner or cord around the top of the head covering.
10) Draw the eyes and mouth on the polystyrene ball. You can also draw on hair if needed.
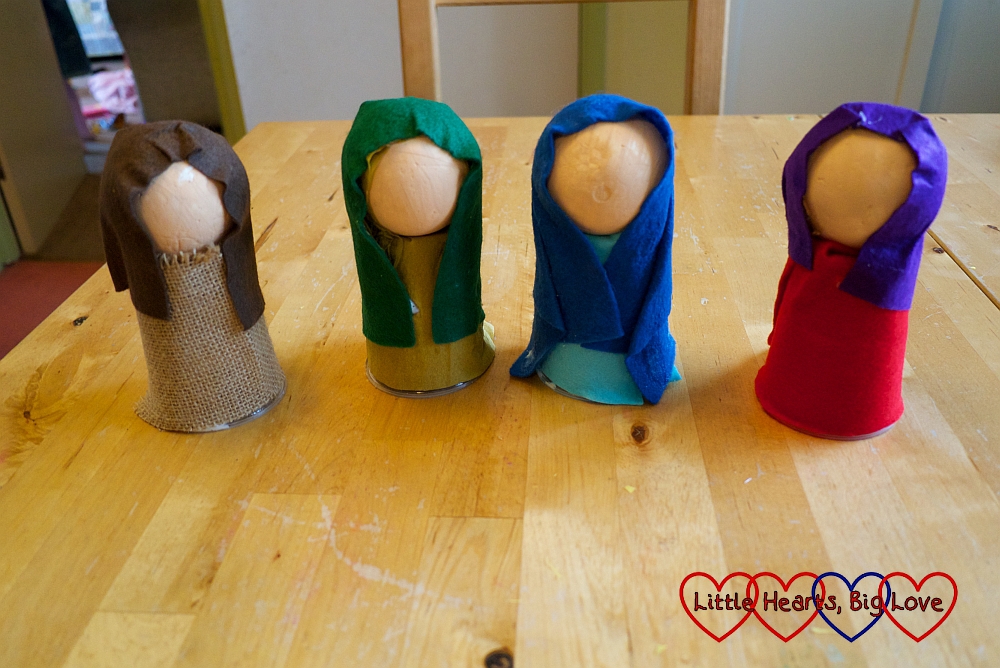
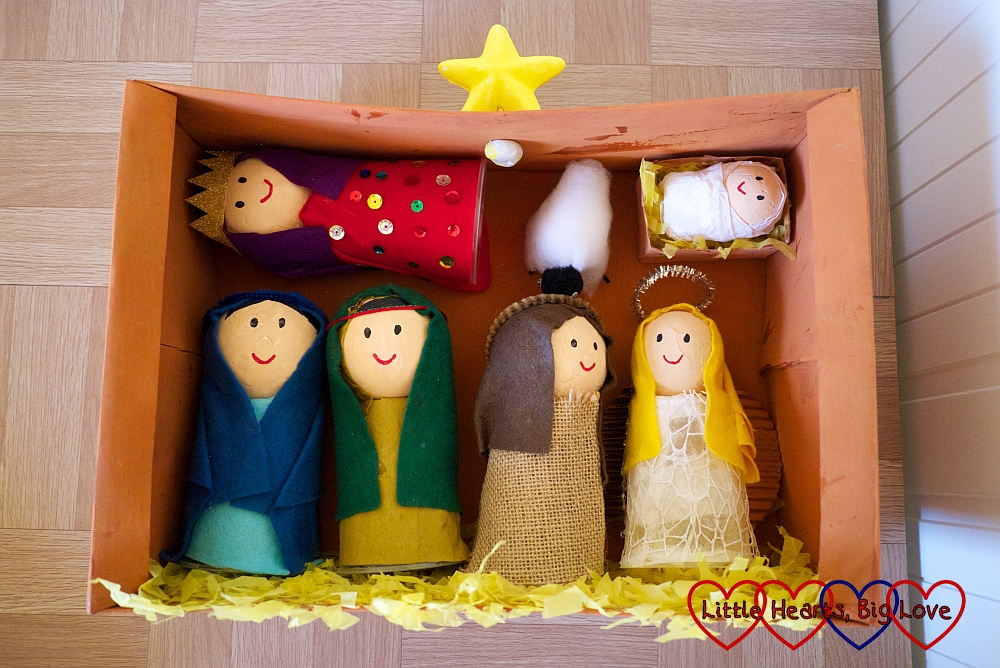
11) Add details for specific nativity characters. Our figures were customised as follows:
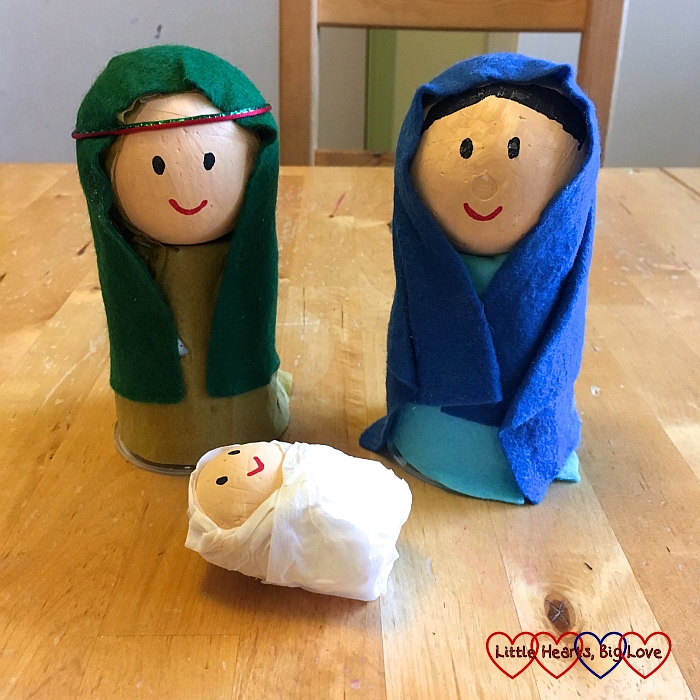
Mary – light blue felt for the body, dark blue felt with a blue pipe cleaner for the head covering.
Joseph – gold tissue paper for the body, dark green felt with a green and red cord for the head covering.
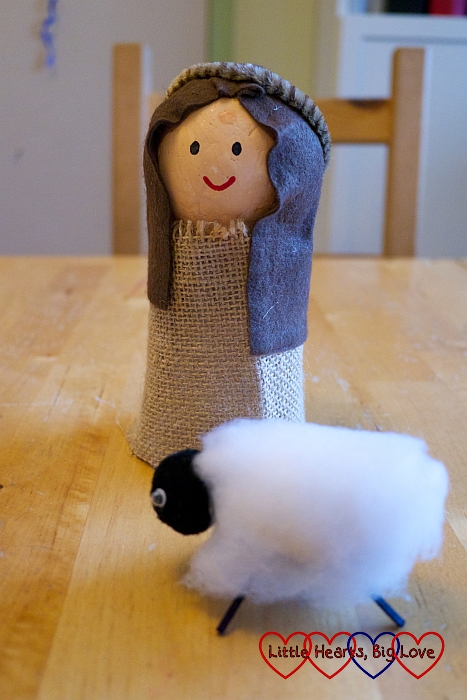
Shepherd – a piece of hessian for the body, brown felt with a brown pipe cleaner for the head covering. The sheep is made from one polystyrene egg with the bottom half coloured black using a marker pen. Use the marker pen to colour four matchsticks and push the matchsticks into the bottom of the polystyrene egg to make the legs. Cover the egg with glue and wrap a piece of wadding or stick pieces of cotton wool around the egg to make the fleece. Stick a black pompom on for the head and add googly eyes.
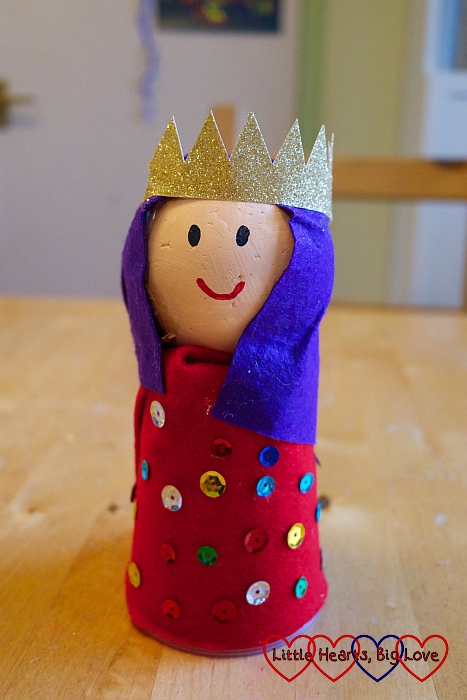
King – a piece of red felt for the body and purple felt for the head covering. Cut out the crown from a piece of gold cardboard and glue around the top of the head. Stick sequins, beads or jewels to the body to decorate.
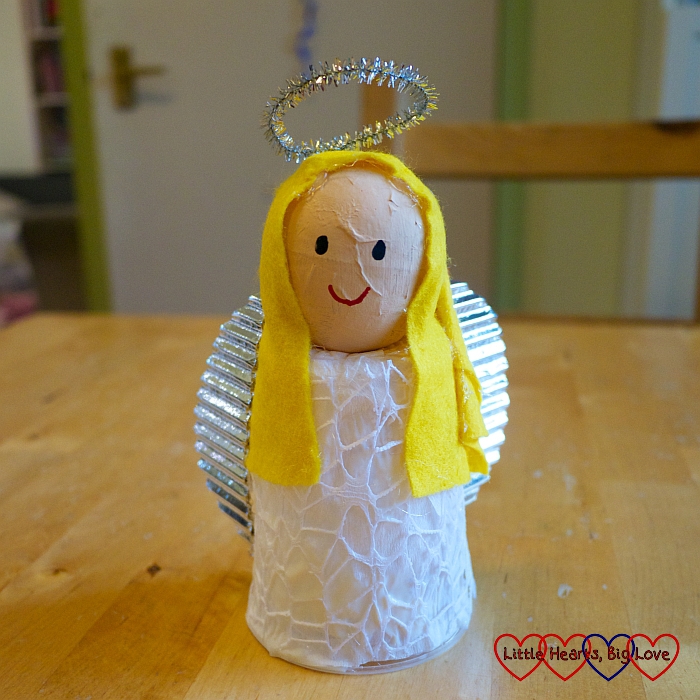
Angel – white crêpe paper for the body with an overlay of white webbed fabric and yellow felt for the hair. The halo is made from a silver pipe cleaner glued to the back of the head. Cut two wing shapes from silver cardboard and glue to the body. I used hot glue to secure the wings and halo.
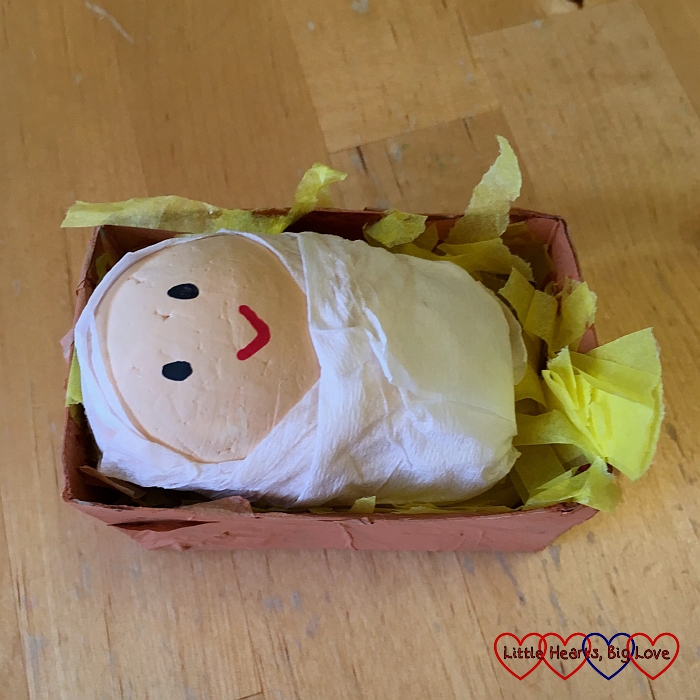
Making baby Jesus in the manger
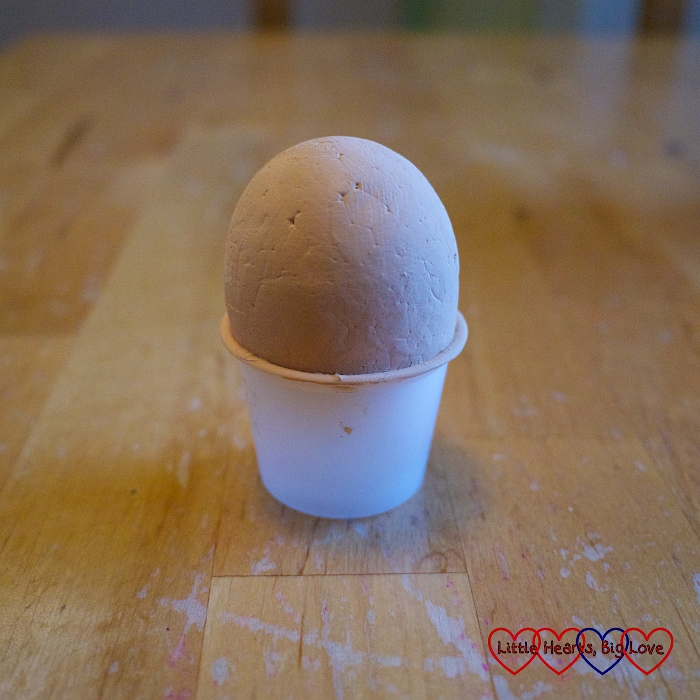
1) Place the polystyrene egg inside the small plastic pot. I used one of the plastic dip pots from a fast food restaurant for this. Paint the egg with skin-coloured paint and leave to dry. Apply a second coat if needed.
2) Cut a piece of white tissue paper big enough to wrap around the egg and pot. Spread a layer of glue across the piece of tissue paper and wrap around the egg and pot to make the swaddling bands.
3) Draw eyes and a mouth on the polystyrene egg for the face.
4) Cut the bottom off a small cardboard box to make the manger. Paint the inside and outside brown. You may need to glue small pieces of tissue paper over the box and leave to dry before painting.
5) Spread glue across the inside of the painted manger. Stick some shredded yellow tissue paper inside for the hay and leave to dry.
6) Place baby Jesus inside the manger.
We only made one king and one shepherd for our Nativity scene but you can make more if you wish. The figures we made fit neatly inside the shoebox stable for storage.
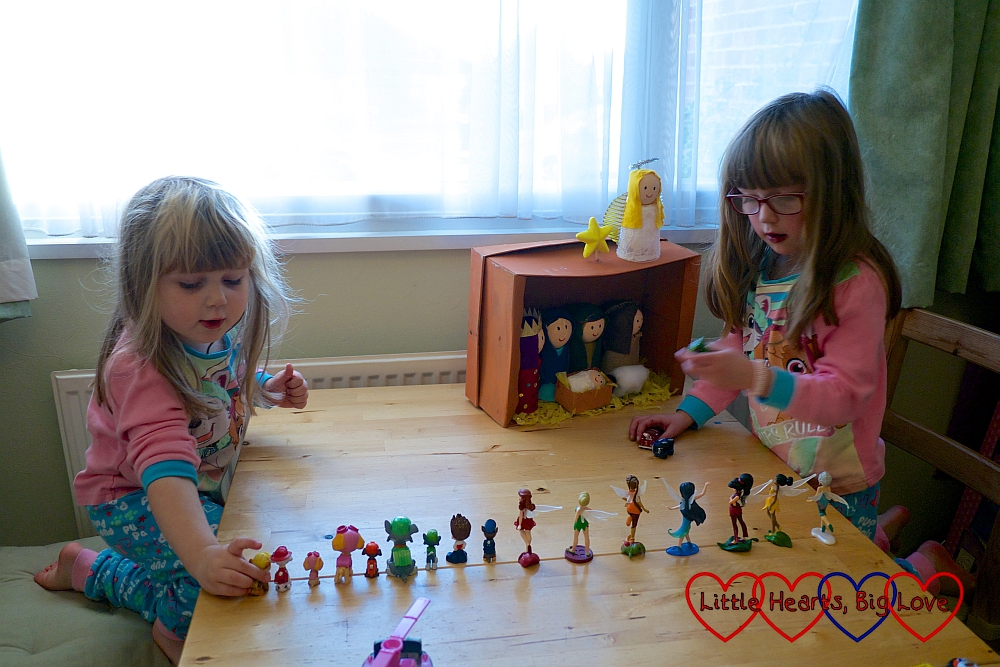
My girls love their finished Nativity scene and have had a wonderful time playing with the figures and retelling the Christmas story. Their version of the Nativity is a somewhat interesting one though. Visitors to the stable so far have included some fairies and the Paw Patrol pups. Mary and Joseph have often had to pose for “souvenir selfies” with baby Jesus too. It is a lovely way though to bring the Nativity story to life for them even if their version might be a little different!
We were sent a box of Bostik craft materials as part of being a Tots100 #BostikBlogger
Love this idea! Will have to give it a go! #BloggerClubUK
This is so cute and what a fun activity to do together with kids. My daughters would definitely enjoy this. #BloggerClubUK
Oh my goodness this is brilliant! You’ve all done a fabulous job, it looks so intricate! Not sure we’ll be trying this one, we’re just not that talented but it’s lovely to see yours!
Nat.x
Aww! This is just adorable. What a lovely idea x
I was considering getting a plastic figure one for the girls but this looks so much fun. Will have to pin this. #bloggerclubuk
I wish I had thought of this idea when I was working as a registered child minder, the children would have loved it #kidsandkreativity@_karendennis
this is fantastic! Ill definitely be . giving it a crack with my two. #kidsandkreativity
Ah really love this idea. We’ve not made a nativity yet, but it’s given me some great ideas. I love that the kids can really get involved and the finsihed product looks great! Thanks for linking up to #KidsandKreativity, hope to see you back next time x