We’ve been learning about the life cycle of various insects recently as part of our #30DaysWild activities. The butterfly life cycle is always a favourite one for children to learn about. The transformation from caterpillar to butterfly is quite fascinating, especially when viewed through a little one’s eyes. Our latest craft box for our #BostikBlogger crafts was perfect for creating a picture to help teach the children about the different stages of the butterfly life cycle.

You will need:
- A piece of card or paper
- Scissors
- Pipe cleaners in green, red and brown
- Sequins, or small buttons
- Leaf shapes
- Butterfly stickers
- Glue (we used a Bostik Fine and Wide Glu pen and Bostik White Glu)
- A marker pen
Stage 1: Eggs
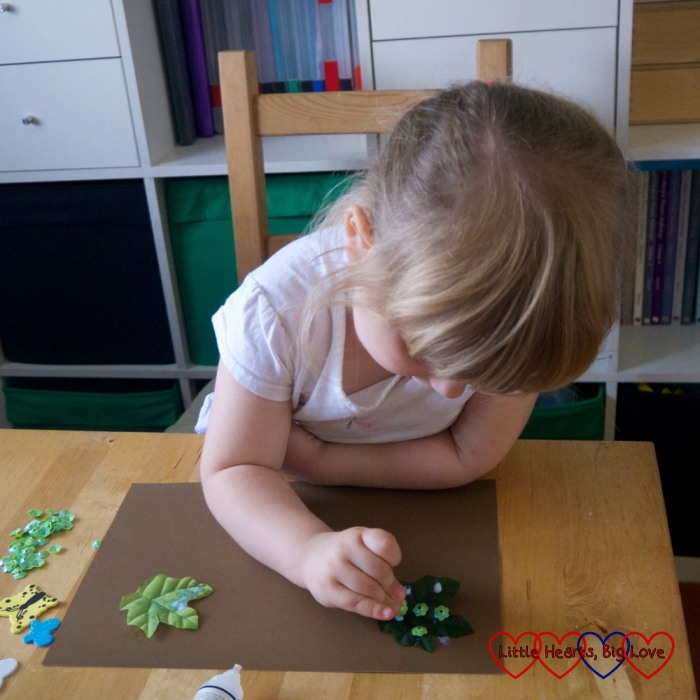
Stick a leaf shape to the top left hand corner of the piece of card/paper. Glue sequins or small buttons to the leaf to make the eggs.
Stage 2: Caterpillars
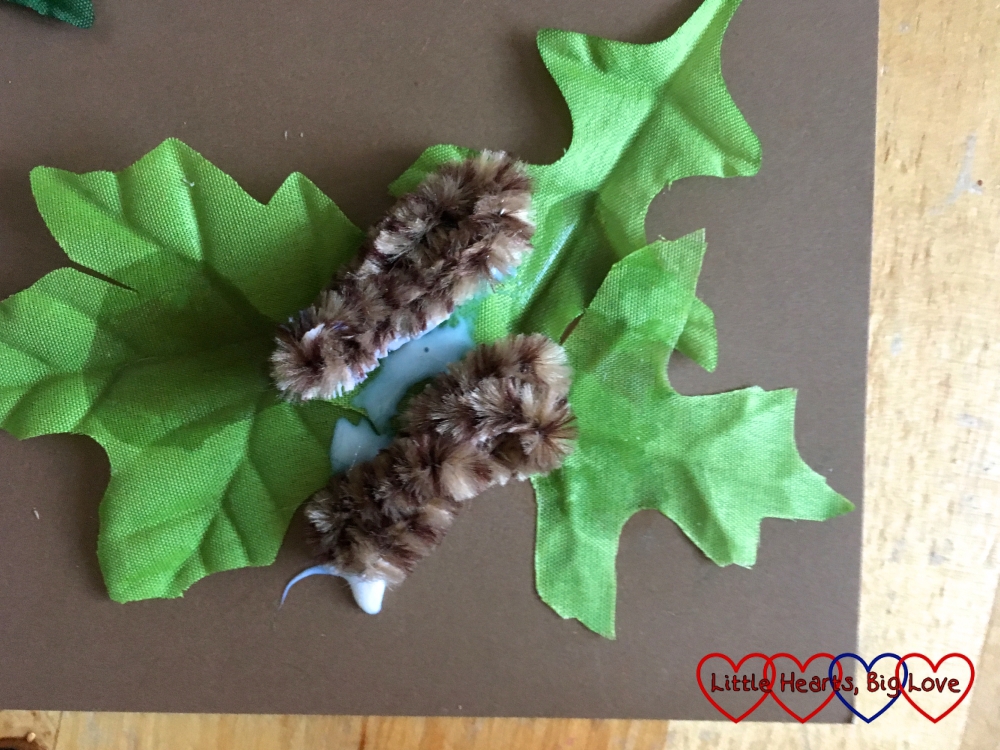
Stick some more leaf shapes to the top right hand side of the piece of card/paper. Cut small piece of green or red pipe cleaner for the caterpillars. You can leave the pipe cleaner plain (especially if it’s a thick fuzzy piece of pipe cleaner) or thread sequins along the pipe cleaner. This is good for encouraging fine motor skills. Glue the caterpillars to the leaves.

Stage 3: Chrysalis
Stick another leaf shape to the bottom right hand side of the piece of card/paper. Cut a brown pipe cleaner in half. Fold in half once and then in half again and then twist the pipe cleaner to make the chrysalis. Glue to the leaf.
Stage 4: Butterflies
Stick some butterfly stickers to the bottom left hand side of the piece of card/paper. Connect the four stages by drawing arrows with a marker pen.

We were sent a box of craft materials from Bostik as part of being a Tots100 #BostikBlogger

Oh what a lovely idea, learning about the lifecycle through craft. Definitely something to try out with my two, thanks!
Nat.x
Thanks Nat, the girls loved doing it and it was such a fun way to help them learn 🙂
Nice craft idea! Showing a butterfly’s life — from egg → caterpillar → chrysalis → adult — using simple art makes learning fun and memorable. It’s a great way to help kids understand nature’s magic.